Hello, World
Just about every framework ever written has some kind of hello world example included, so it’d be pretty rude of us to break this tradition!
We’ll start out by creating a very very basic hello world, and then we’ll expand it to follow MVC principles.
Bare bones
First off we have to make a controller that Kohana can use to handle a request.
Create the file application/classes/Controller/Hello.php in your application folder and fill it out like so:
<?php

Class Controller_Hello extends Controller
{
	public function action_index()
	{
		echo 'hello, world!';
	}
}
Lets see what’s going on here:
<?php- You should recognize the first tag as an opening php tag (if you don’t you should probably learn php). What follows is a small check that makes sure that this file is being included by Kohana. It stops people from accessing files directly from the url.
Class Controller_Hello extends Controller- This line declares our controller, each controller class has to be prefixed with
Controller_and an underscore delimited path to the folder the controller is in (see Conventions and styles for more info). Each controller should also extend the baseControllerclass which provides a standard structure for controllers. public function action_index()- This defines the “index” action of our controller. Kohana will attempt to call this action if the user hasn’t specified an action. (See Routes, URLs and Links)
echo 'hello, world!';- And this is the line which outputs the customary phrase!
Now if you open your browser and go to http://localhost/index.php/hello you should see something like:

That was good, but we can do better
What we did in the previous section was a good example of how easy it to create an extremely basic Kohana app. (In fact it’s so basic, that you should never make it again!)
If you’ve ever heard anything about MVC you’ll probably have realised that echoing content out in a controller is strictly against the principles of MVC.
The proper way to code with an MVC framework is to use views to handle the presentation of your application, and allow the controller to do what it does best – control the flow of the request!
Lets change our original controller slightly:
<?php

Class Controller_Hello extends Controller_Template
{
	public $template = 'site';

	public function action_index()
	{
		$this->template->message = 'hello, world!';
	}
}
extends Controller_Template- We’re now extending the template controller, it makes it more convenient to use views within our controller.
public $template = 'site';- The template controller needs to know what template you want to use. It’ll automatically load the view defined in this variable and assign the view object to it.
$this->template->message = 'hello, world!';$this->templateis a reference to the view object for our site template. What we’re doing here is assigning a variable called “message”, with a value of “hello, world!” to the view.
Now lets try running our code…

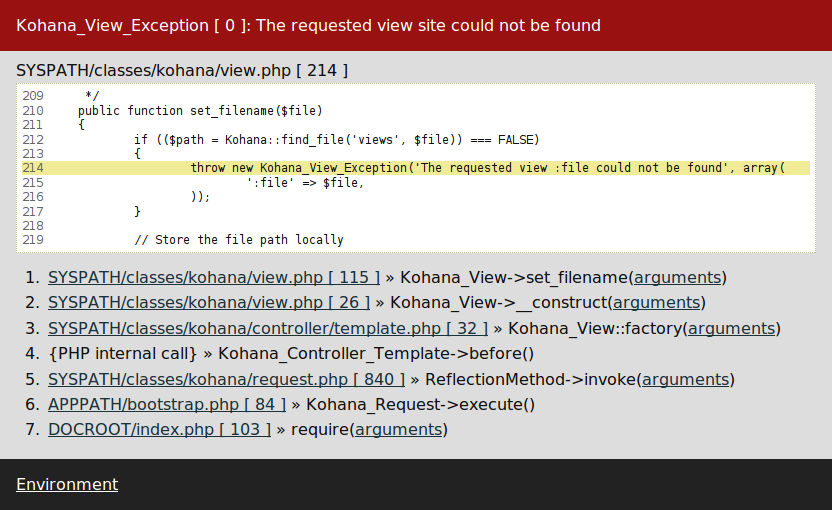
For some reason Kohana’s thrown a wobbly and isn’t showing our amazing message.
If we look at the error message we can see that the View library wasn’t able to find our site template, probably because we haven’t made it yet – doh!
Let’s go and make the view file application/views/site.php for our message:
<html>
	<head>
		<title>We've got a message for you!</title>
		<style type="text/css">
			body {font-family: Georgia;}
			h1 {font-style: italic;}

		</style>
	</head>
	<body>
		<h1><?php echo $message; ?></h1>
		<p>We just wanted to say it! :)</p>
	</body>
</html>
If we refresh the page then we can see the fruits of our labour:

Stage 3 – Profit!
In this tutorial you’ve learnt how to create a controller and use a view to separate your logic from your display.
This is obviously a very basic introduction to working with Kohana and doesn’t even scrape the potential you have when developing applications with it.
